
A Roof Leak Can Cost You Thousands — Here’s What to Do First
Roof leak repair is urgent — water moves fast inside a wall or ceiling, and what starts as a small stain can turn into rot, mold, and structural damage within weeks.
Quick answer: How to repair a roof leak
- Find the source — Check your attic first with a flashlight. Look for wet spots, dark stains, or mold on rafters and sheathing. Remember: water travels downhill, so the entry point is almost always higher than the drip.
- Identify the cause — Damaged shingles, cracked flashing, failed vent boots, and clogged gutters are the most common culprits.
- Apply a temporary fix — Use rubberized roofing cement or a waterproof tarp to stop active water intrusion right away.
- Make the permanent repair — Replace damaged shingles, reseal or replace flashing, and fix vent boots.
- Call a pro — If your roof is over 20 years old, has widespread damage, or shows signs of structural sagging, skip the DIY and get a professional inspection.
Here in Metro Detroit and Southeast Michigan, we see roof leaks year-round — but winter and early spring hit the hardest. Ice dams, freeze-thaw cycles, and heavy snow load put our roofs under stress that homeowners in warmer states simply don’t deal with. A small drip after a January thaw can mean water has been sitting under your shingles for weeks without you knowing.
The first sign of a leak for most homeowners? A yellow or brown stain on the ceiling. Sometimes it’s a bubble in the drywall paint. Sometimes it’s just a musty smell coming from the attic that wasn’t there before. By the time you see it inside, the damage outside has usually already been happening for a while.
The good news: most common roof leaks are fixable — and fixing them early is almost always cheaper than waiting.
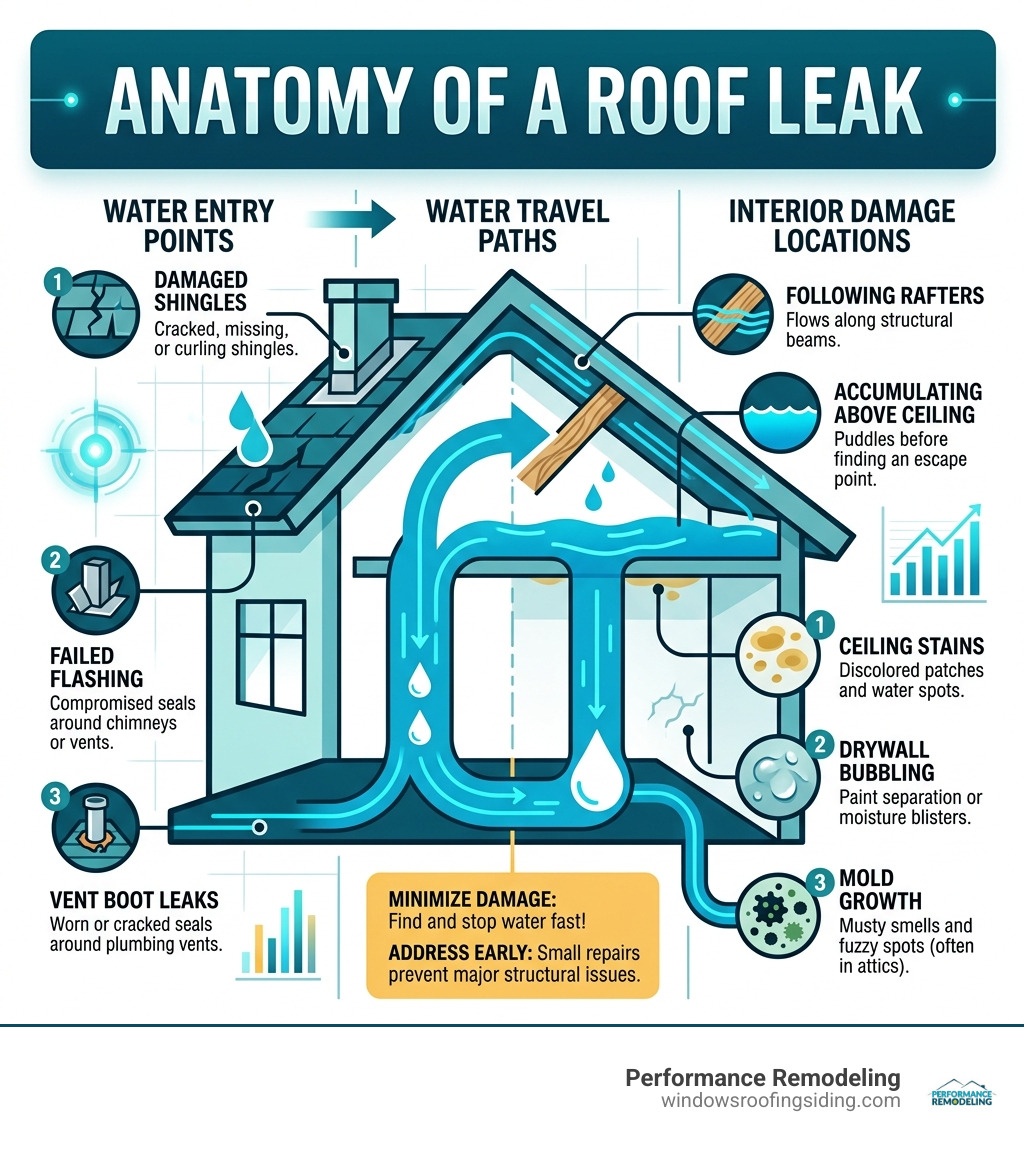
Identifying the Source and Causes of Your Roof Leak
Finding the source of a leak is often more difficult than the actual roof leak repair. Water is sneaky; it rarely drips straight down from where it enters. Instead, it follows the path of least resistance, running along rafters or the top of the ceiling drywall until it finds a screw hole or a joint to drip through.
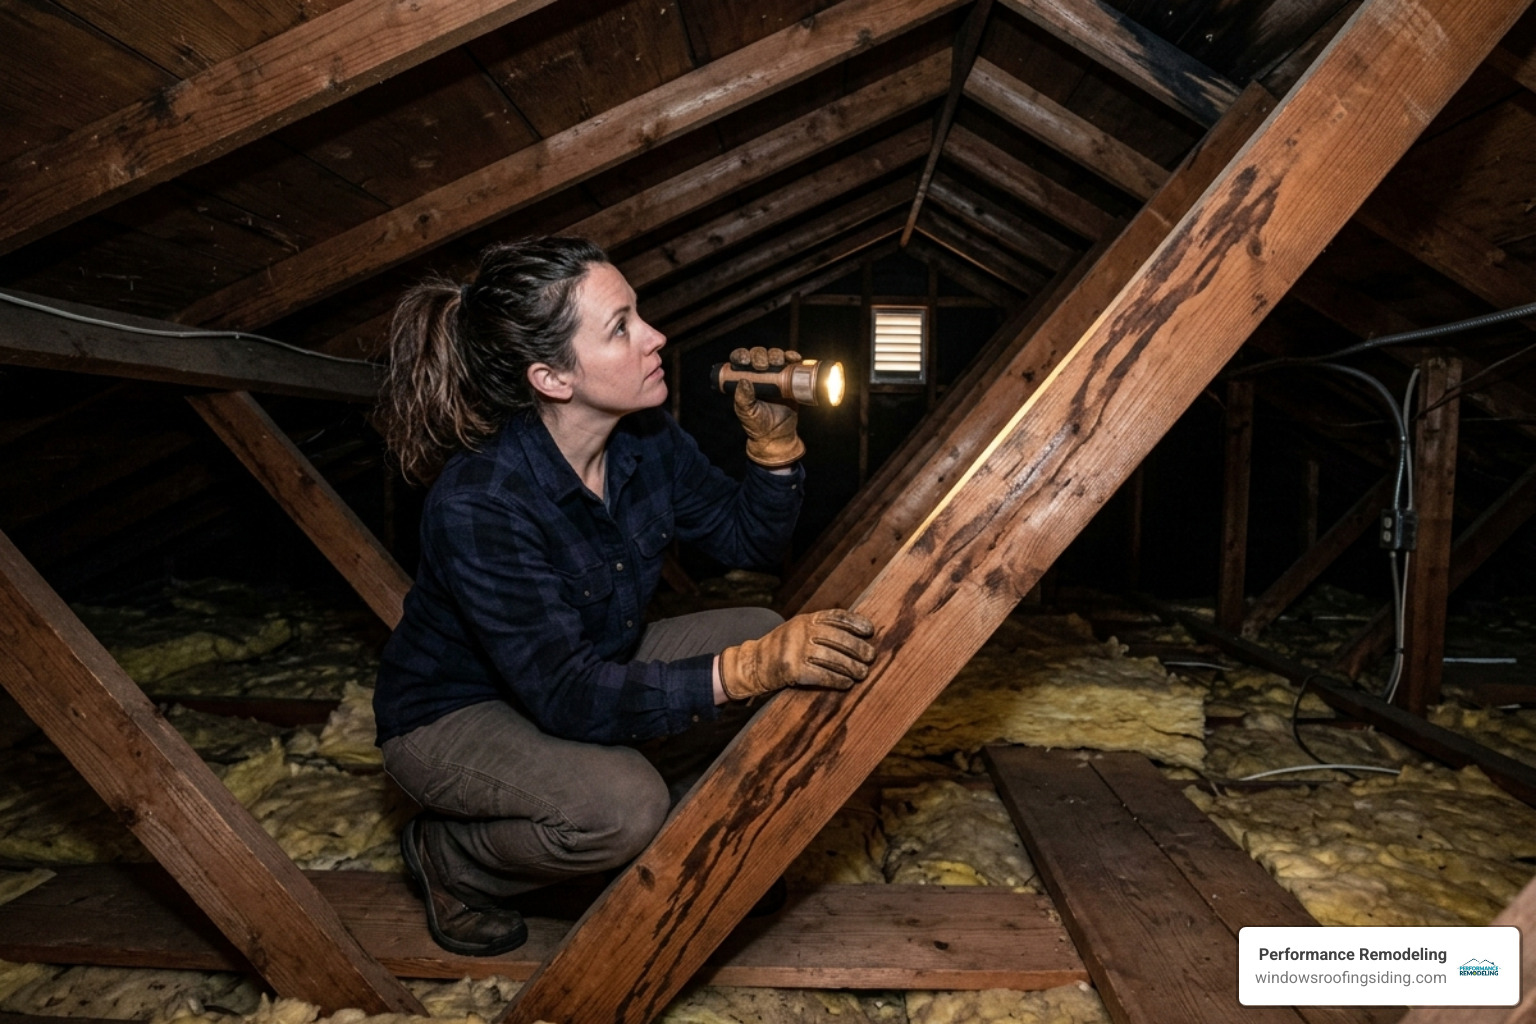
The Attic Inspection
Before you climb onto your roof, head into the attic. Grab a high-powered flashlight and look for:
- Wet Spots or Shiny Streaks: Even if it isn’t currently raining, water often leaves a “trail” of dark stains on the plywood sheathing or rafters.
- Mold and Mildew: If you notice black, white, or green fuzzy growth, you have a persistent moisture problem.
- Musty Odors: That damp basement smell in an attic is a dead giveaway that water is trapped.
- Daylight: If you see “stars” (pinpricks of light) through the roof boards, you’ve found a hole.
If you are struggling to pinpoint the location, you may be dealing with complex Roof Problems that require a systematic approach.
The Hose Test
If the weather is dry and you can’t find the entry point, grab a garden hose and a helper. While one person stays in the attic with a flashlight, the other stays on the roof. Start low—near the gutters—and soak a small area for several minutes. Work your way up the roof slowly. When the person in the attic sees a drip, you’ve found your culprit. This “detective work” is a staple of any How to Fix a Roof Leak [2026 Guide] | Angi because it isolates specific penetrations like vents and chimneys.
Common Causes in Southeast Michigan
In our neck of the woods—from Farmington Hills to Rochester Hills—our roofs face unique challenges.
- Ice Dams: During May 2026, we are still seeing the effects of the previous winter. Ice dams occur when heat escapes your attic, melts snow on the roof, and that water refreezes at the cold eaves. This creates a “dam” that forces water upward under the shingles.
- Freeze-Thaw Cycles: The constant expanding and contracting of water in small cracks can tear apart even the toughest flashing.
- Clogged Gutters: When gutters are full of leaves and maple “helicopters,” water backs up and soaks into the roof edge, leading to rot. You can Keep Your Home Safe With Roof Maintenance In Farmington Mi by ensuring your drainage system is clear.
Early Warning Signs Inside and Out
Knowing what to look for can save you a massive headache. Use this table to check your home’s health:
| Interior Warning Signs | Exterior Warning Signs |
|---|---|
| Bubbling Drywall: Water is pooling behind the paint. | Granules in Gutters: Shingles are losing their protective coating. |
| Peeling Paint: Moisture is breaking the bond between paint and wall. | Curled Shingles: Heat or age is causing the material to warp. |
| Yellow/Brown Stains: Classic sign of a slow, persistent leak. | Missing Shingles: High winds have exposed the underlayment. |
| Damp Insulation: Wet fiberglass loses its R-value and breeds mold. | Damaged Flashing: Metal around chimneys is rusted or pulled away. |
Essential Tools and Materials for Roof Leak Repair
If you’re planning a DIY roof leak repair, you’ll need more than just a ladder and a prayer. Having the right kit ready to go can mean the difference between a 20-minute fix and a weekend-long disaster.
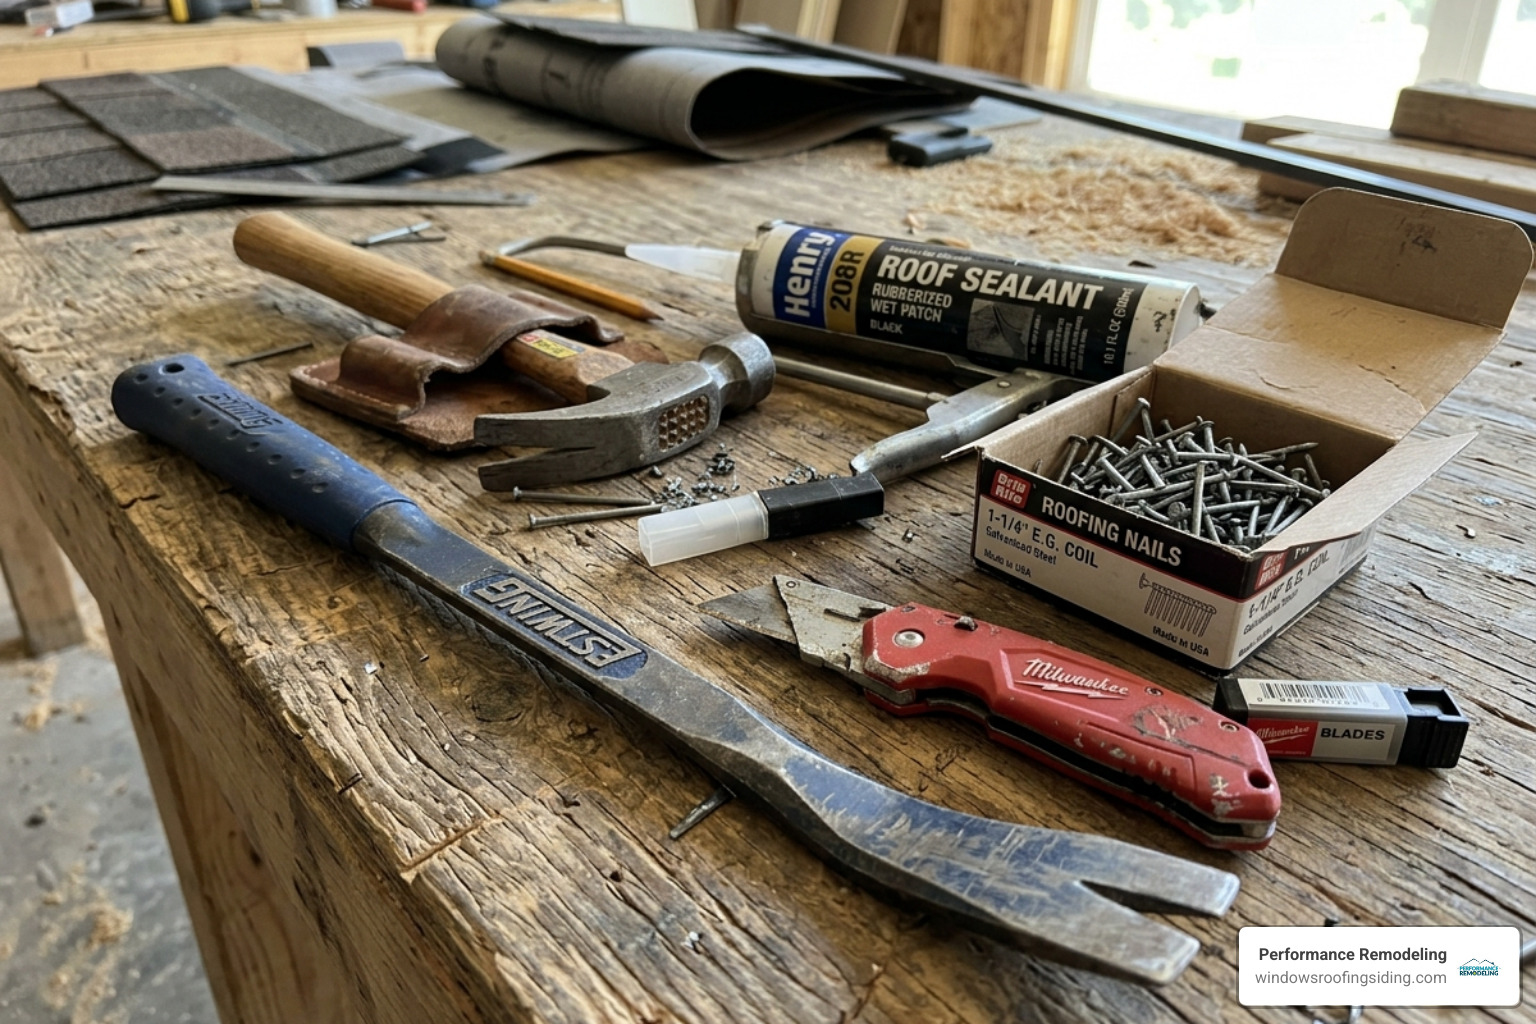
Your Repair Kit Checklist:
- Roofing Cement: Look for high-quality, rubberized wet patches.
- Pry Bar (Flat Bar): Essential for lifting shingles without tearing them.
- Utility Knife: For cutting shingles or clearing away old caulk.
- Replacement Shingles: Matching your current style is important for curb appeal. Why Asphalt Shingle Roofing Is Still The King Of The Cul De Sac because they are the easiest to repair and replace.
- Galvanized Roofing Nails: To prevent rust.
Safety First During Roof Leak Repair
We cannot stress this enough: your safety is worth more than a dry ceiling.
- Never work alone. Always have a helper to steady the ladder.
- Check the weather. Never go on a roof if it is wet, icy, or if high winds are expected.
- Wear the right gear. Soft-soled boots provide the best traction on asphalt. For steep slopes, use a Personal Fall Arrest System (PFAS) harness as recommended by How to Repair a Roof Leak – This Old House.
- Ladder Safety: Ensure your ladder extends at least three feet above the roof edge and is on level ground.
Recommended Sealants and Patches
For a quick, reliable fix, we often recommend products like the Henry 208R Rubberized Wet Patch. It currently holds a 4.5 out of 5 rating from over 2,000 users, and for good reason—it can be applied even in standing water or during a rainstorm.
For larger cracks, use the 3-course method:
- Apply a layer of sealant (about 1/8 inch thick).
- Embed a piece of mesh fabric or glass fabric into the wet sealant.
- Apply a second layer of sealant over the fabric.
This creates a patch that is significantly stronger and more UV-resistant than just using “goop” alone.
Step-by-Step Guide to Common Repairs
Now that you’ve found the leak and gathered your tools, it’s time to get to work. Most roof leak repair jobs fall into three categories: shingles, flashing, and flat roof issues.
How to Perform a Shingle Roof Leak Repair
If you have a few broken or missing shingles, you can likely handle this yourself.
- Lift the Shingle: Use your pry bar to gently break the adhesive seal on the shingle above the damaged one.
- Remove Nails: Slide the bar under the damaged shingle to pop the nails out. You’ll usually find four to six nails per shingle.
- The “Blow Dryer” Trick: If it’s a chilly Michigan morning and the shingles are brittle, use a hair dryer to warm them up. This makes them pliable so they won’t crack while you’re working.
- Install New Shingle: Slide the replacement into place. Pro Tip: Round the back corners of the new shingle with your utility knife; it makes it slide into the “pocket” much easier.
- Nail and Seal: Use galvanized nails and apply a dab of roofing cement over the nail heads for extra protection. For more on general roofing techniques, check our guide.
Fixing Flashing and Vent Boots
Flashing is the metal “shield” around chimneys, vents, and skylights. It is the #1 place leaks occur.
- Vent Boots: These are the rubber “collars” around plumbing pipes. They often rot out after 10 years. If yours is cracked, you can often slide a new rubber boot right over the old pipe.
- Chimney Flashing: If the sealant is cracked, scrape away the old stuff with a putty knife and apply a fresh bead of high-quality silicone caulk or roofing cement.
- Dormer Joints: Where a wall meets the roof, “step flashing” is used. If this is rusted through, it generally requires a professional to ensure the siding and roof are properly integrated.
Addressing Flat Roofs and Blisters
Flat roofs (common on garages or additions in Metro Detroit) use EPDM membranes. A common issue is a “blister”—an air or water bubble under the surface.
- Slice it: Use a utility knife to carefully cut through the center of the blister.
- Dry it: Use a towel or hair dryer to ensure the substrate underneath is bone dry.
- Patch it: Apply roofing cement under the flaps, press them down, and then apply a large patch over the top using the 3-course method.
When to Call a Professional for Roof Leak Repair
We love a good DIY project, but sometimes, a “simple” roof leak repair is just a bandage on a much larger problem.
The 20-Year Rule
If your roof is over 20 years old, it is likely reaching the end of its functional lifespan. At this age, the shingles become brittle, and fixing one leak often just leads to another popping up a few feet away. In these cases, we recommend reading A Homeowners Guide To Roofreplacement In 2026 to understand your options.
Signs You Need a Pro:
- Structural Sagging: If your roofline looks like a “swayback horse,” you have serious structural rot. Do not walk on it.
- Widespread Damage: If more than 20% of your shingles are curling or missing, a patch won’t cut it.
- Insurance Claims: If your leak was caused by a major storm or a fallen tree limb, you need professional documentation. We can provide the detailed inspections that insurance adjusters require to approve your claim.
- Specialty Materials: Slate, tile, and high-end metal roofs require specialized tools and training. Don’t risk damaging these expensive materials with a DIY attempt.
As noted in How to Repair a Leaky Roof, a professional evaluation is the best way to determine if you need a specific repair or a full system replacement.
Frequently Asked Questions about Roof Leak Repair
Does homeowners insurance cover roof leak repairs?
Usually, yes—if the damage was caused by a “sudden and accidental” event like a windstorm, hail, or a fallen tree. However, most policies do not cover leaks caused by “lack of maintenance” or general wear and tear on an old roof. This is why annual inspections are so important.
Should I repair or replace my old leaking roof?
If your roof is under 15 years old and the damage is localized (like one branch hitting one spot), a repair is your best bet. If the roof is over 20 years old and you’re seeing multiple leaks or “bald” shingles (missing granules), a replacement is more cost-effective in the long run.
Conclusion
A leaking roof is a race against time. Whether you’re in Shelby Township, Novi, or West Bloomfield, the volatile Michigan weather won’t wait for you to “get around to it.” By identifying the source early and using the right materials, you can protect your home’s structural integrity and your family’s safety.
At Performance Remodeling, we’ve spent over 20 years serving the Metro Detroit area. We pride ourselves on quality craftsmanship and a comprehensive lifetime guarantee backed by Performance Remodeling. If your DIY repair feels like it’s getting out of hand, or if you want the peace of mind that comes with a GAF-certified professional inspection, we are here to help.
Don’t let a small drip turn into a major disaster. More info about roofing services is just a click away, or give us a call to schedule your free estimate today. We’ll help you stop the drip before you slip!